
| Growing

If you don’t personally know who cultivated your cannabis, it probably isn’t safe to consume. Bold statement? Hardly. In California, 84 percent of cannabis samples tested by Steep Hill Labs were deemed ‘unfit for human consumption’ due to the use of toxic pesticides. The solution is simple—start growing at home. Cannabis cannot be considered medicine if it’s grown with the use of synthetic fertilizers and toxic pesticides.
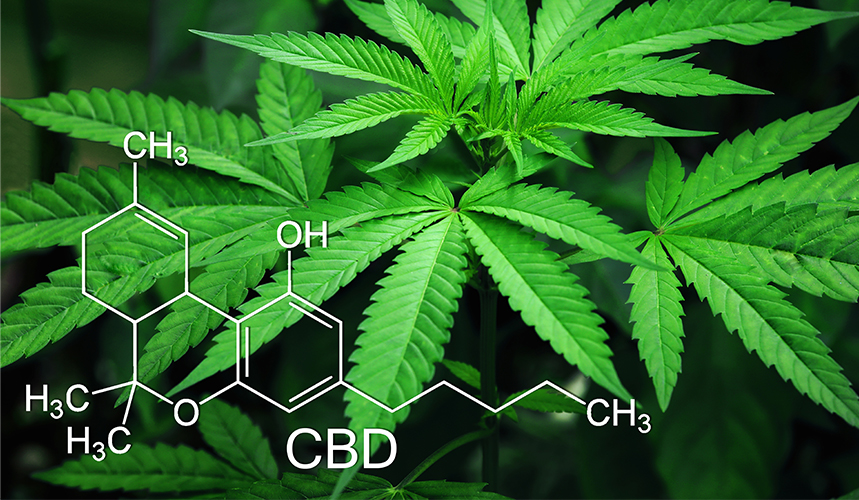
Furthermore, there’s nothing worse than being subject to the single strain stocked by your weed dealer—and believe it or not, dispensaries don’t always carry the strain you’re looking for. Whether you prefer CBD-rich strains or high-THC strains, growing your own allows you to always smoke what you want—not just the most popular, over-hyped strain. There’s a certain comfort in always knowing what you’re getting, especially if you are purchasing for medical use. Say ‘no’ to toxic weed with harmful side effects, start growing your own today!
Table of contents
The Best Cannabis for the Best Price: Homegrown
We’ve all experienced weed that tastes like hay, buds that burn the throat, or that less than stellar eighth–and it’s always disappointing. Commercially cultivated cannabis, whether grown legally or illegally, is grown for quantity not quality. And you can guarantee it wasn’t grown organically with an emphasis on cannabinoid and terpene production.
Simply put, if you want to smoke the best top-shelf weed, you have to grow it yourself. With the right inputs and some professional guidance, you’ll easily be cultivating top-shelf organic buds that far surpass the quality level of the dispensary or your dealer.
Get The Most Pot For The Least Money
Sick of buying by the gram? Imagine smoking by the ounce. Even a small 4’x4’ tent can supply a daily cannabis consumer for several months. Thus, cultivating a single light’s worth of marijuana can truly yield an unlimited supply of cannabis for the average person.
People think that growing weed is expensive, but it doesn’t have to be. In reality, growing weed involves an up-front investment for an endless supply of cannabis. Imagine smoking more and paying less than you currently do—you’ll never run out again!
Save The Earth
By implementing sustainable techniques, you not only save your wallet, and the Earth, too! When using the organic techniques, you’ll re-use your soil each cycle, only adding the minimal inputs needed to keep the soil balanced after each harvest. In fact, your soil health will improve with each successful harvest.
Alternatively, with soil-less growing systems, none of the grow medium is re-used. While hydroponic cultivation is all the rage, it requires all-new grow mediums and nutrients with each and every harvest. Not to mention the often-toxic runoff produced by the synthetic fertilizers used in hydroponic and soil-less grows. Watering to run-off is not necessary and you’ll only use natural inputs that are derived from plants, trees, or the Earth’s crust.
8 Steps to Growing Weed at Home
Many people have entertained the idea of growing a weed plant in their home but don’t know where to begin. That’s why we’ve put together this article, starting with the eight basic steps to growing weed. Keep in mind that this is a high-level overview that explains the setup and plant life cycle through harvest. Further explanation as to how to grow weed at home can be found later in this article.
Step 1: Set up a Grow Space
This could be your backyard, a closet, or a grow tent in a basement. It’s entirely up to you and your specific space availability. The important thing to keep in mind is that no matter how large or small the space, the goal is the same—to simulate the natural environment in which plants grow: nature.
We strongly recommend growing indoors and further explanation can be found later in this article.
Step 2: Acquire Seeds or Clones
There are two ways to begin growing cannabis: from seed and from clone. Cannabis seeds are just what they sound like—seeds of the cannabis variety. You can find cannabis seeds for sale at dispensaries and online seed banks. The alternative is to start from a clone—quite literally the branch of another plant that has established roots. The benefit to clones is consistency; you know the plant the clone came from and can expect an exact replica—hence, the name.
Step 3: Pick a Grow Medium
You will also have to choose which grow medium to use: i.e. soil or hydroponics. In soil, the seeds will get germinated first and then sowed in the grow medium to begin their new life. Clones can be planted into soil or another grow medium as soon as they have established roots. You can force a cutting to grow roots a number of ways—using an aeroponic cloner, using rooting plugs, or even setting the cutting in a cup of water.
We strongly recommend growing in soil for its benefits to you and the Earth. Further explanation can be found later in this article.
Step 4: Sexing
It’s important to keep in mind that only the female cannabis plants produce the flowers we all know and love. This means that when growing from seed, the male plants must be identified and removed from the garden—this process is known as sexing. Clones, assuming you acquired them from a reputable source, are already confirmed as females. This is one of the main reasons novice growers like to begin with clones, it’s one less step to have to worry about.
Step 5: Vegetative Growth
This is the second stage in the plant’s life cycle (after germination). As the plant’s root system gets more established in the grow medium, vegetative growth will be fast and vigorous. Vegetative growth is the stage in which the plant is using photosynthesis to grow shoots, leaves—the mass it will need to flower and reproduce in the next stage of life.
Step 6: Flowering
After the vegetative phase, the plant will transition into the flower phase. This is the time in which the plant begins producing…you guessed it, flowers! The changeover from vegetative growth to the flowering stage is caused by the light cycle—shorter nights result in vegetative growth and longer nights (12 hours) result in flowering. Depending on the variety of cannabis you are growing (i.e. indica or sativa), the flowering stage can last anywhere from six to over 16 weeks.
Step 7: Harvesting
At the end of the flowering cycle, the buds will be heavy and covered in trichomes—the little bulbous hairs containing the THC, CBD and other cannabinoids you worked so hard to grow. Each strain has what is known as a harvest window—the limited time frame in which the strain should be harvested for maximum potency, flavor, and effect. For some strains this is just a few days and for others it lasts weeks. When the plant is ready to be harvested, simply cut the plant down at the base.
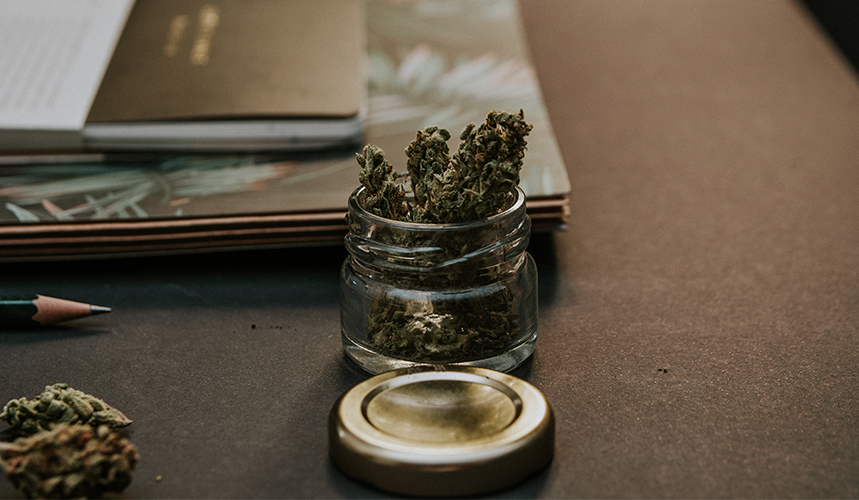
Step 8: Dry, Trim & Cure
After cutting the plant down, the flowers aren’t going to look like buds that you are used to smoking. That’s because the flowers still need to be dried, trimmed, and cured. A freshly harvested plant is full of moisture that must be removed prior to smoking. Plants are typically hung upside down by their stalk for one to two weeks to dry. After that time, the leaves surrounding the buds are trimmed away, exposing the buds that we are all so familiar with. These dried and manicured buds can now be stored in glass mason jars to cure—the process in which the potency, flavor and smell of the bud is enhanced.
Choosing a Grow Space: Outdoors vs. Indoors
Before you actually begin growing weed, you must determine where you’ll grow the plants. The first distinction at this step is pretty obvious—will you grow them indoors or outdoors?
Outdoors
Choosing a space outside for cannabis plants is relatively easy as they will be in their natural habitat and simply need to be placed in an area with adequate light. If you live in an area that experiences rainy weather in summer and fall, I would suggest setting up a greenhouse or small hoop-house. These will provide protection against precipitation and provide greater environmental control.
One of the major things to consider before growing outside is the proximity of your neighbors and whether the plants will be visible to onlookers. Security is a major concern when growing outside—even in legal states. Many legal states also require the plants to be grown in a locked and sectioned off area—make sure to check your local laws.
Overall, it’s important to recognize that growing outdoors is the most natural way to produce cannabis—the sun is the ultimate grow light. That said, you are also subject to Mother Nature and her elements, which can make total environmental control near impossible, even in a greenhouse. The reason so many people cherish indoor-grown cannabis is because with the right equipment, total environmental control is achievable. Growing outdoors also runs a higher risk of pest and animal issues.
Indoors
There are lots of potential places you can grow indoors: basement, closet, garage, spare room, bathroom, etc. When selecting the best place to grow cannabis indoors, there are several things to consider:
1. Size
Consider the size of space you want to dedicate—can it accommodate a grow tent or will you build it out? One of the major criteria that often gets overlooked is height—cannabis plants like to grow tall and the light can’t be too close to the plants. Grow tents are typically six-and-a-half feet tall, which means you’ll need a ceiling just over that height if you intend to use a full-size grow tent. The taller the ceilings the better, especially if you are building out the room and can mount the lights to the ceiling. Shorter areas are certainly possible but not recommended.
2. Exhaust
Does it have access to a window or adjacent room for purposes of exhausting air? Unless you are planning to grow pot in a sealed room, which requires the use of CO2 and A/C, you’ll need to constantly cycle air through the room or grow tent. This will require using an exhaust fan that typically pushes air through ducting and out of the room or grow tent.
3. Temperature
Is the area you are considering temperature controlled? Remember marijuana plants like a specific temperature range and anything outside of that begins to stress them out. It’s also important to keep in mind that the grow light will raise the temperature of the area you are growing in, so selecting a cooler zone is preferable.
4. Security
Similar to growing marijuana outside, it’s important to select an area that is relatively discreet—you don’t necessarily want everyone that visits your home to know you cultivate cannabis. Per state laws, you may also have to keep your cannabis in a sectioned off and locked area.
5. Sealed or Vented Room
After selecting the perfect indoor grow space, you’ll need to determine whether you are going to run a sealed or vented room (or tent, as the case may be). This is major distinction and will drastically impact how your grow room is set up and what equipment you’ll need to purchase.
Before I get into the specifics of each type of grow room setup, we need to make sure you understand the basic environmental factors cannabis needs to grow. When we refer to environmental controls as they relate to growing weed, we’re talking specifically about temperature, humidity, and CO2 levels. Regardless of the type of room (vented or sealed), each of these parameters needs to be kept within a specific range.
Fresh Air Exchange
As the name indicates, this style of indoor grow room relies on constantly exchanging the air in the room so that the cannabis plants are always being supplied with adequate CO2 levels. If the air weren’t being exchanged every minute or two, the plants would use all the CO2 available in the air and growth would come to a screeching halt—this is why it’s so important to select an extraction fan that’s powerful enough to exchange the entirety of the air in your grow space each minute or two.
The extraction fan’s air moving capability is measured in cubic feet per minute or CFM. You’ll want to select an extraction fan with a CFM that meets or exceeds your room dimensions—meaning if your room measures 10x10x8 (800 cubic feet), you’ll need an extraction fan that is rated to roughly 800 CFM. The reason we recommend purchasing a fan rated to a volume that’s equal or larger to your room is because of the inefficiencies caused by ducting, lights, and a carbon filter—these will result in the need to add 20-50+ percent to your room’s volume calculation.
Extraction fans are typically connected to a carbon filter that prevents that skunky smell from leaving your grow room. For smaller grow rooms and tents, you’ll only need an extraction fan and can rely on a passive air intake. Alternatively, larger rooms will benefit from an active air intake; however, it’s very important that your extraction fan be rated at a higher CFM than your intake fan to retain negative air pressure in the room. This negative air pressure ensures that all of your grow room air passes through the carbon filter before leaving the room or tent.
Pros
Cheaper: Most rooms/tents only need an extraction fan—no other equipment
Natural: Mimics the natural CO2 levels found in nature
Cons
Less Control: Unless you have extensive automated controls in place, using an extraction fan results in less control over environmental factors like humidity because the air is constantly being replaced.
Sealed Rooms
As you may have guessed, a sealed room is just that—a sealed room that doesn’t allow air in or out. That being said, the same air that continuously circulates throughout the grow room must be conditioned with A/C, supplemented with CO2, and (de)humidified as needed—remember, each of these environmental factors must be kept in a specific range.
In order to ensure those environmental factors are within the desired range, sealed rooms rely on a master environmental controller to monitor the room’s actual levels and triggers the equipment to make adjustments as necessary. As you can see, this requires significantly more equipment than running a vented room.
Pros
More Control: Simply put, this results in the ability to cultivate higher quality cannabis and more of it. Keep in mind that environmental factors and genetics are the two biggest inputs that determine the quality and yield of your harvest. You can now run the ‘perfect’ environment 24/7.
Cons
Cost: Given the large up-front setup cost associated with a sealed room, they are typically reserved for larger operations. While it is possible to run a ‘sealed tent’ most people don’t, as it is simply not worth it.
Choosing a Grow Source: Seeds vs. Clones
 After you choose your grow medium, select your grow space, and get all of the equipment set up, you’ll have to fill the space with some marijuana plants! There are two ways to start cannabis plants—from seed or from clone.
One thing to keep in mind—only the female cannabis plant produces the buds we all enjoy so thoroughly. Males do not produce buds and the presence of males during the flowering cycle will result in pollinated female plants that produce seeds. To sum it up, you don’t want male marijuana plants anywhere near your garden unless you are breeding.
Seeds
Starting cannabis plants from seed is the natural, tried and true way to begin growing pot. It is important to understand that there are three different types of seeds.
Regular Seeds: Regular cannabis seeds are bred by crossing a male and female cannabis plant to produce offspring. The seeds will contain both male and female plants. This means that roughly half of the seeds you germinate will need to be culled to separate the males from females.
Feminized Seeds: Feminized cannabis seeds are bred by crossing two female plants—one of which has been forced to grow male pollen sacks. Because feminized seeds contain no male chromosomes, they are almost always female. Feminized seeds are generally considered to be more cost effective as one can expect all of the seeds to be female.
Autoflower Seeds: Autoflowering cannabis seeds are bred by crossing two different species of cannabis—ruderalis with either sativa or indica. As the name indicates, these seeds automatically begin flowering within a few weeks of germination without the need to alter the light cycle. These seeds are best for beginners with time and height restrictions.
Pros of Seeds
Vigor: Growing from seed results in more vigorous plants. Seeds contain a taproot whereas clones do not.
Acquisition: Cannabis seeds are easy to acquire and easy to produce yourself.
Pathogens: One major upside to growing from seed is you get a clean start—meaning no inherent risk of pests or diseases (unlike clones).
Cons of Seeds
Sexing: If growing with regular seeds, you will need to identify the sex of each plant and remove the males. The process of identifying can be challenging and typically takes a microscope and some practice.
Time: With the exception of autoflowering seeds, growing from seed typically takes longer than growing from clone. This is usually due to the sexing process, which thanks to modern science, can now be completed in the first week or two of germination with a tissue sample.
Variable: No two seeds are alike. This means if you buy a pack of seeds, there will be different genetic expression between the plants—like siblings from the same parents. While this can be fun (trying new varieties) it also means that you can never grow the exact same plant again unless you clone it.
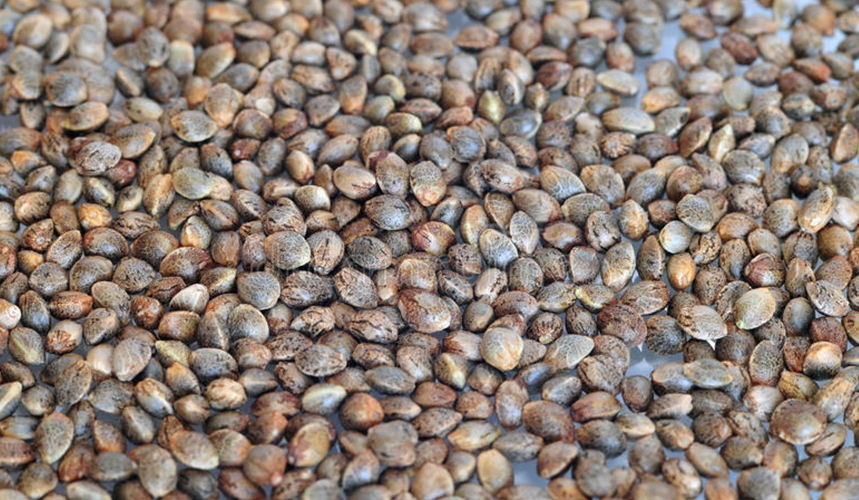
Viable: Not all seeds are healthy or mature enough to germinate. Healthy, fully developed seeds are typically brown in color as opposed to white or yellow.
Clones
A clone is exactly what it sounds like, an exact copy of another cannabis plant. This is achieved by cutting the branch off what is known as a ‘mother plant’ and then forcing it to grow roots – the result is a clone with the exact same DNA as the mother plant.
Pros of Clones
Consistency: Clones are the only way to preserve a certain strain. This is why there are so many strains that are dubbed as ‘clone only’—you can try to recreate them but it’ll be like trying to recreate a snowflake.
Cons of Clones
Access: Acquiring clones can be very difficult if you don’t live in a legal state. It’s crucial that you source your clones from a trusted garden to ensure you get the strain you intended. Furthermore, many ‘exclusive’ genetics are tightly held by certain grow circles.
Pathogens: The other reason it’s important to get your clones from a trusted source is the risk of introducing clones with existing pests and diseases. This is extremely common—in fact, sharing clones is the leading cause of pests and mold in cannabis gardens.
Vigor: Remember, cannabis is an annual plant, which means in nature, the plant completes its entire life cycle from germination to production of seed within one year and then dies. Which means clones are not natural in nature. It is heavily debated whether clones lose their vigor over time, but one thing is for sure: Clone health is essential for maintaining vigor.
Choosing a Grow Medium: Hydroponic vs. Soil

One of the first major crossroads you’ll encounter when learning how to grow weed is deciding which grow medium to use—soil or soil-less (hydro). While there are pros and cons to each, we truly believe that soil-grown cannabis is superior. The biggest difference between these two mediums is that soil is alive while hydroponic mediums are inert—this is a very important distinction.
Hydroponics (soil-less)
There are lots of different hydroponic mediums; hydroton, rockwool, coco coir, the list goes on—but they all have one thing in common: They are inert. Why is this so important? Because the plant is dependent on you! This means you, the grower, will have to supply the marijuana plant with all of its required nutrients throughout the entire life-cycle. In other words, the rhizosphere (sphere of roots) is attached to a nonliving medium and only receives food when watered.
This can be a very challenging place for new growers to begin because you are truly controlling every variable; how frequently you water, how much to water, how strong the solution is (ppm/EC), the acidity (ph), the ratio of nutrients, etc. For lack of a better term, you are playing God. Although many experienced growers actually prefer the standardization that hydroponic growing allows, in our opinion, the finished product is simply not as flavorful. And it is a fact that growing hydroponically is more expensive and less—read, not—sustainable.
Living Organic Soil
Instead of trying to control Mother Nature, I prefer to harness her natural power through the use of living organic soil. Living organic soil (LOS) is exactly what it sounds like, healthy, balanced soil that’s loaded with life—bacteria, fungi, protozoa, nematodes, insects, and worms—all of which work together to form what is known as the soil food web.
More specifically, the soil food web describes the relationship between these microorganisms that serve a very important function: They make and maintain the soil. These organisms decompose organic matter, turn atmospheric nitrogen into plant-usable forms, rearrange soil particles and out-compete pathogenic organisms.
All plants rely on the soil food web to thrive in nature—plants can, indeed, take care of themselves without people getting in the way—they’ve been using it for thousands of years. Cannabis plants don’t need fancy bottled nutrients to produce abundant crops; they need balanced living soil and pure water. Balanced soil contains all the minerals and nutrients required for plant growth, from there, the plant can decide which food it needs, how much to consume, and when it needs it. That’s why you’ll often hear organic gardeners refer to ‘feeding the soil as opposed to feeding the plant.’ What does this matter to you? It means that growing in soil helps you save time and money.
The Bottom Line: As you feed your soil, it will become more balanced and full of life—it truly gets better over time. You’ll save time, money, and the environment by re-using your soil each cycle.
You can start off with a quality Organic Living Soil like Purple Cow IndiCanja.
Combining the Two
Synthetic chemical fertilizers and pesticides should not be incorporated into a living organic soil watering regimen, they will kill soil life. In fact, many of these microorganisms can’t even survive a drench of city water treated with chlorine and chloramine. The beauty of utilizing the soil food web is that the plants already have what they need—just keep the soil content balanced. The only inputs needed to supplement the soil should be derived from nature; kelp meal, neem cake, earthworm castings, compost, fermented fruits, etc.
Growing Weed at Home: Indoors
As cannabis grows more popular (and legal, in an increasing number of states), so does interest in cultivating the herb. As largely urban and suburban living spaces lack the acreage necessary for an outdoor grow space, most individual gardeners grow weed indoors rather than out.
Indoor growing offers some advantages over outdoor gardens, but also creates some unique challenges of its own. Many cannabis novices dream of growing their own marijuana, but lack the necessary knowledge and experience to do so successfully.
Growing marijuana plants inside (and therefore away from natural sunlight) might sound like a tough job, but trust us, it’s not that hard. With some specialized tools and a bit of know-how, growing your own cannabis can be surprisingly simple—not to mention rewarding. That said, you will need a complete set of equipment and a solid plan before you can set up your indoor cannabis growing operation.
Here, we have compiled a brief collection of information to help you grow marijuana indoors, right in the comfort of your own home (and away from prying eyes). We’ll break down where to grow, what you’ll need, how to get the most out of your grow space, and more. By the end of this article, you’ll have all the crucial information you need to grow your own delicious buds.
Where to Grow Weed Indoors
The first step to get growing is to choose the right location to grow cannabis indoors. You’ll want to choose a place where the plants will not be disturbed as they grow, away from major fluctuations in temperature, lighting, and humidity. These inconsistencies can harm delicate young plants and hurt the quality of your finished herb.
Many people choose to use a closet or cabinet like an armoire to set up their grow spaces, but you can also purchase such spaces ready-made. These might include something like a specialized grow tent or stealthy cabinet. We like these options best because they create a private space to grow weed indoors discreetly.
Grow tents offer lots of adjustability, allowing beginner growers lots of control over factors like light, humidity, temperature, airflow, etc. The enclosed space of the grow tent provides an added benefit as well: It prevents insects and other pests from feasting on your cannabis plant and hampering your harvest.
Grow cabinets are another great option if you are looking to grow cannabis indoors without anyone knowing about it. These grow boxes are designed to look like your average cabinet, preventing them from arousing suspicion.
For beginners just starting out, we recommend starting with a three-foot by three-foot growing tent, which will allow you to grow two to four plants at once. GrowAce has quite a few options to meet the needs of every grower, no matter your budget.
Selecting Your Seeds
Perhaps the single most important factor of growing your own cannabis is selecting quality seeds. If the seeds you plant are of poor quality, then all your hard work and preparation will yield, at best, mediocre results. For the dankest nugs, you’ll need the best seeds you can find.
The legality of buying cannabis seeds varies from state to state depending on the legal status of marijuana where you live. With that in mind, be cautious when ordering seeds from seed banks or attempting to cross state lines with cannabis seeds, as they could be confiscated.
The best seeds for your personal use will depend on what you enjoy most about cannabis. Every strain has differing flavors, effects, terpenes, and cannabinoid profiles that will affect the final flower. We recommend researching the differences between strains in order to get a better idea of what you like best. You might also consider your grow space: Indica strains tend to be short and bushy, while sativas are usually taller and lankier.
If you are able to, we suggest purchasing your seeds from a seed bank, such as Southern Humboldt Seed Collective or Exotic Genetix. These US-based seed banks offer quality seeds for strains from around the globe. If you live in a legal state, you may also consider asking your local dispensary for recommendations.
Germinating Cannabis Seeds
This is where things start to get real. For this step, you’ll need a bit of patience and some basic knowledge of horticulture. It’s not that germinating cannabis seeds is hard (it’s called weed for a reason!) but they’re delicate at this stage and need some extra attention.
To make germination as easy as possible, we suggest purchasing seedling plugs or starter cubes from an online retailer or garden center.
These little blocks of soil are intended to give your seed everything it needs to thrive as it germinates, yielding a healthier plant. There are even rapid-root plugs available for a speedier germination. However, you can also DIY your own with some soil in small containers, like old egg cartons, with a bit of compost for nutrients.
We suggest this Accel-a-Root 50 Cell Starter Tray from GrowAce.
Whether you choose ready-made starter cubes or a homemade version, insert one cannabis seed per cube and hydrate thoroughly with water. Keep the cubes moist and out of direct sunlight (a windowsill is a good spot) until they begin to sprout. Then, place the entire cube into your growing medium—as discussed earlier in this article—being careful not to disturb the sprout.
Choose a Growing Medium
While you’re waiting on your seeds to germinate (which can take a week or longer), you should put together your final grow space. This includes selecting a growing medium, or the substrate in which you plan to cultivate your cannabis plants. There are many different options available, including classic soil, deep-water culture, coco coir, hydroponic setups, and others. The most common growing mediums are soil and hydroponic indoor grows, which we’ll discuss separately, below.
Organic Soil
A perennial favorite for a reason, soil remains one of the best, most tried-and-true ways to grow strong, healthy cannabis plants. Why buy organic? Well, all plants pick up the nutrients in the soil they grow in, along with any residual nastiness that might be there. Cannabis and hemp do this especially well, meaning that any yuck in the soil ends up concentrated in the plant. It’s important, then, to choose a soil that’s safe and free of heavy metals, pesticides, toxins, and other potentially harmful compounds.
While a bag of organic potting soil from your local garden center will do the trick, you can also customize your own soil blend with relatively little effort. You might include things like worm castings, compost, coco fiber, or peat moss alongside perlite or loam for drainage. Ingredients like crab, blood, or kelp meal can add soluble hydrogen to help your indoor cannabis plants grow their best.
Hydroponic
If you just can’t get behind soil growing (or simply want to do something different), we suggest trying a hydroponic setup. Hydroponics are widely used by commercial growers and are surprisingly easy to set up in a home grow as well.
Marijuana grown hydroponically tends to yield more flower more quickly compared to soil. It also allows you to add select nutrients directly to the water rather than risking disturbing the plant to add a solid fertilizer to soil. We find ready-made hydroponic kits (like the various-sized options available from GrowAce) are well-suited to growing cannabis indoors at home.
If you want to make things as easy and fool-proof as possible, the HID Hydro Complete Indoor Grow Tent System is two feet by four feet (perfect for small areas) and comes with literally everything you need. It’s a true starter pack for indoor hydroponic growing.
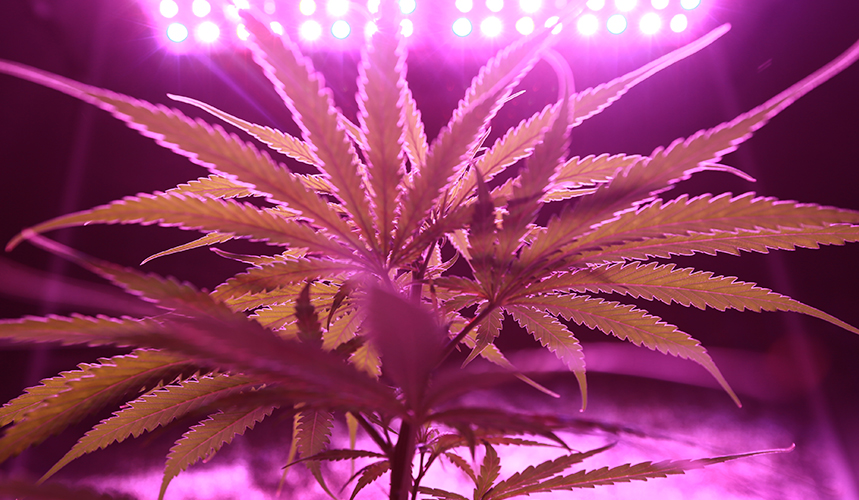
LED Grow Lights for Indoor Use
Since your indoor grow won’t be getting much natural sunlight, you’ll need to supplement your plants with plenty of light from other sources. There are a couple of different options here: high-intensity bulbs (HID), CFL, fluorescent, or LED lighting are all appropriate. That said, we strongly prefer good LED lights, for a couple of reasons:
- Low warmth – Many older varieties of lighting tend to release a lot of heat when used over long hours. This heat can build up in your grow chamber, damaging your plants, which is no good! LED bulbs have the lowest available heat emission today, even when they’re on for hours at a time.
- Full-spectrum Light – LEDs offer multiple frequencies of light to provide your cannabis plants with all the energy they need to be healthy and vibrant. Most LED bulbs allow you to customize the frequency of the light they emit so adjust the light quality as your plants grow.
- Discretion – LED bulbs tend to be much smaller and more portable than their incandescent and fluorescent counterparts. This allows them to fit more readily into small spaces like a grow tent or cabinet. They’re also more energy-efficient, so your grow won’t eat up too much power.
Our favorite LED grow light has to be the Kind LED K5 Series XL1000 WIFI Indoor LED Grow Light. If you don’t need something that fancy, the S540 Advance Spectrum MAX LED Grow Light is a great option, too.
Indoor Lighting For Every Grow Stage
Alright, you know what kind of light to use, but how much light will your plants need, and when? Not to fret, we’ve got you covered.
The timing schedule outlined below is a regular time schedule that’s pretty representative of common practices among cannabis growers worldwide. However, it may be adjusted as desired according to personal preference. Don’t be afraid to get a little creative with it—as long as their schedule stays regular, your plants will be flexible with you.
At the Vegetative Stage
The vegetative phase of plant growth is the period between germination and flowering. During this time, your plant is doing lots of photosynthesis to build up energy stores in preparation for flowering. It’ll also be growing quite a bit to make space for plenty of flowering sites—yay!
During this period, a bulb with a cool temperature can help spur growth. We suggest lighting with a blue-based tone, as this is closest to natural daylight. Healthy plants will produce plenty of leaves and shouldn’t appear “leggy,” a sign the marijuana is searching for a better light source.
Generally, the best timing during the vegetative stage is to provide light for 18 hours per day, followed by six hours of darkness. Recently, however, a different schedule has been proposed. While it is still being tested, some growers prefer to provide light in six-hour bursts, with each light period followed by a two-hour period of darkness.
At the Flowering Stage
Also called the bloom phase, flowering indicates that the plant is finally putting its resources toward creating those delicious buds. Its efforts shift away from putting out new leaves and stems and towards reproducing. Warm temperature lights with a red cast to them will help to spur flowering and create larger, more luscious flowers.
During this time, the light should be on for 12 hours per day and off for another 12 hours. This cycle encourages the plant to flower, as it mimics the shortening of daylight hours leading into the winter months (when the plant normally goes dormant).
The light kits we mentioned above all have accessories to help you out with the whole process, including setting the different modes and timing.
Nutrients Needed to Grow Weed Indoors
Giving your marijuana plant the appropriate nutrients in the proper amount is vital in determining if you will get a meager, skimpy harvest or an impressive load of dense, luscious buds.
A common novice-grower misstep is giving your marijuana plants too little (or way too much) nutrients. Low nutrients result in the plant not growing to its full capacity. Alternatively, overloading your plants with more nutrients than they can handle can send them into shock, burning the roots and even killing the plant.
With that in mind, it’s critical to keep track of nutrients—especially if you are using a hydroponic grow setup to grow weed indoors. There are some excellent plant nutrients available on the market, which are proven to work wonders for your bud harvest. Let’s talk in a bit more detail about when and how to use nutrients:
Nutrients at the Vegetative Stage
The most crucial compound your homegrown marijuana plant needs in its vegetative phase is nitrogen. Nitrogen is abundant in fertilizers, castings, meals, and other garden nutrients, but check the label carefully before applying any product to your plants. Follow dilution instructions carefully to avoid accidentally overdoing it.
Nutrients at the Flowering Stage
As your plant begins to flower, it will need less nitrogen and more phosphorus and potassium. These compounds will help to encourage blooming and are often found in products like bone meal.
If you doubt your abilities to choose appropriate fertilizers to successfully grow weed indoors, look for nutrient packs labeled Bloom or Vegetative. These pre-made nutrient packs will help remove the guesswork (though you should still read the directions thoroughly before use)!
If you don’t want to have to even worry about it, FoxFarm’s Liquid Nutrient Trio Soil Formula has you covered. The pack comes with all three of the formulas you’ll need. From their instructions:
- Start with Grow Big for abundant green growth
- Switch to Tiger Bloom at the first sign of bud set or flowering
- Use Big Bloom throughout all growing cycles to heal root systems and increase nutrient cycling
Support Your Plant’s Growth
- Lighting: Make sure that you have knowledge of lighting times of marijuana plants in different phases. Both the vegetative phase and the blooming phase have different lighting schedules.
- Environment: Every cannabis strain has a different set of requirements in terms of what kind of temperature, humidity, and other things it grows best in. Research the conditions of your particular marijuana strain, then set all the parameters accordingly.
- Watering: Giving water to your plants is vital because you have to keep it in balance. Make a watering schedule and observe the growth of the plant; if the plant shows problems, then you might want to change the watering amount and frequency.
- Protection: As with almost all kinds of plants, marijuana plants also need sheltering from pests, diseases, and bacteria. Some of the strains sold on the market are naturally resistant to mold and pests, so again, research your strain and use plant protectors if needed.
- Discretion: If you are growing marijuana without letting anyone notice it, then there are a few things you can do to make sure you don’t get caught. For example, you can add carbon air filters to your grow tent. These filters will filter out the marijuana smell when the ventilation system expels the air. Here’s one that’s high quality and affordable.
Indoor Cannabis Growing Equipment
This section is going to explain what equipment is required to actually start growing cannabis at home. This is by no means an exhaustive list but rather the bare minimum. There are millions of other optional items you can incorporate but this article will address the nine basic items needed to grow premium weed indoors on a budget.
Tent or Liner
You’ll need to make sure that the inside of the room or tent is as reflective as possible (to maximize your grow light’s output). You’ll also need to ensure that no outside light can penetrate into the room or tent (mandatory for seedless flowers).
The easiest way to satisfy both of these requirements is with the use of a grow tent or a room liner. Grow tents and liners are typically made of canvas, Mylar and/or black & white poly film. In addition, these films provide a truly separate environment that will help keep bugs and mold out of your grow area.
Grow Light
Since you are growing indoors, you’ll have to select a grow light to replace the sun. There are several different types of grow lights and unfortunately, there is no best option. Choosing a grow light comes down to the dimensions of your space, your budget, your growing goals, and your power limitations. The good news is, lighting technology has improved over recent years and nearly all lights—HPS, CMH, LED, and DE will work.
Extraction Fan
An extraction fan is essential for keeping temps down and supplying the plants with the fresh air (CO2) they need to thrive. Note that you do not necessarily need an extraction fan if you are running a sealed room—but you will need an A/C and CO2 generator, which is a significantly more expensive alternative.
Carbon Filter
As the plants enter the flowering phase, they start to give off that pungent odor we all know and love—unless you’re the uptight neighbors. Carbon filters are the answer to that terpene-rich, skunky weed smell. You definitely don’t want to get a cheap carbon filter—make sure you stick to reputable brands when it comes to this essential piece of equipment!
Ducting
Although not glamorous, ducting is a crucial item in your garden’s ventilation system. For smaller grows, we recommend flexible, insulated ducting—the insulation helps keep the heat (caused by the hot air) from radiating into your growing area. I recommend using six-inch ducting at a minimum; larger grows will benefit from larger diameter ducting.
Circulating Fan
Circulating fans simulate nature’s gentle summer breeze. The more the merrier here, just make sure they have adjustable speed settings—you’ll notice we said gentle breeze, not gusting tornado.
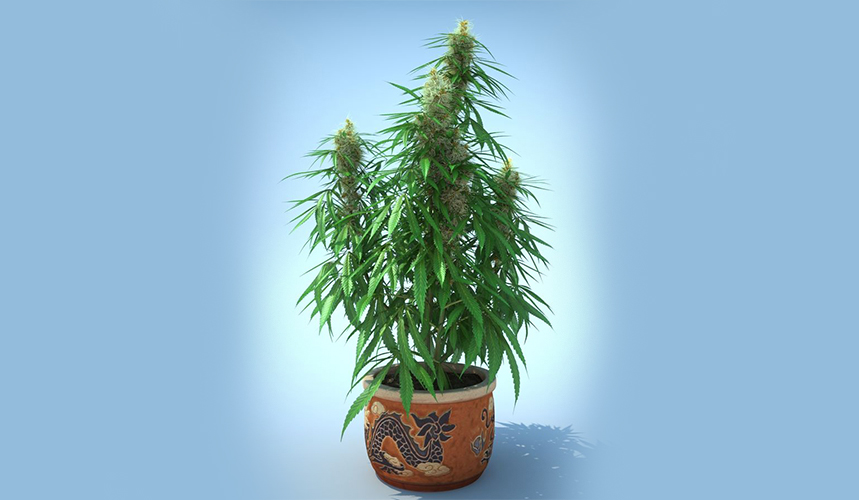
Pots/Beds
You’ll need containers to grow the plants in. You can use plastic pots, fabric pots, buckets, totes, or planter beds. Just make sure you have a container(s) to grow your plants in. If you’re growing in soil, use the largest containers you can fit in your grow space—your plants will thank you for the extra root space.
Grow Medium
As mentioned above, we are huge proponents of living organic soil. Nature got it right, you don’t need fancy hydro equipment or synthetic nutrients to grow quality cannabis.
Filtered Water
The final piece to the puzzle is ensuring you have access to clean, filtered water. The sad fact is that most city water is less than ideal for growing cannabis—it’s full of contaminants like chlorine, chloramine, fluoride—the list goes on. You don’t need an expensive filter, and if you can’t afford one, you still have two other options—go to the grocery store and fill a five-gallon jug with RO water for 25 cents per gallon, or get some air stones and bubble the water for a minimum of 24 hours.
The Best Grow Light for Cultivating Cannabis Indoors
 There are several factors to consider when choosing a grow light, the primary ones are:
Decision Factors
- Room height
- Budget
- Energy consumption
- Light intensity/penetration
- Light spectrum
- Heat
- Fixture size
- Bulb lifespan
High Intensity Discharge (HID)
HID lighting refers to a type of light bulb that is filled with gas but lack a filament. They are the most similar to your standard indoor light bulb but more powerful. The most common bulbs for growing are High Pressure Sodium (HPS) in the flowering stage and Metal Halide (MH) in the vegetative stage. These are still the basic, standard grow light—they’ve been used for centuries and for good reason—they’re reliable, cheap and produce great cannabis.
Pros
These are the cheapest fixtures that can be used for flowering and they can be purchased in a variety of wattages. Light penetration is pretty good on wattages 600 and above. Lower wattage, air-cooled fixtures can be placed closer to the canopy and can easily manage heat output.
Cons
These fixtures run hot, especially without air-cooling. You’ll need high ceilings to run 1,000 watt HPS fixtures. Energy consumption is relatively high on all HID fixtures as they aren’t as efficient as newer fixtures as far as its energy-to-output ratio goes. These fixtures can be relatively large and heavy. Bulbs should be replaced every 12 months.
Double Ended (DE)
DE fixtures are the newest advancement in HPS bulb technology. Essentially the bulb is secured and powered on both ends, as opposed to the single-ended HPS bulb described above. What does this mean? Increased light intensity, broader spectrum, and longer bulb life. It’s safe to say that DE bulbs have become the standard for most commercial growers looking to implement an HPS grow light. These lights can be used for both the flowering and vegetative stages.
Pros
These fixtures provide incredible light intensity and canopy penetration. The spectrum is also superior to single-ended HPS options. The DE fixtures are also typically smaller than single-ended HPS fixtures. DE bulb life is nearly double that of a single-ended HPS bulb.
Cons
The downside to DE fixtures is that they are costly and use significant amounts of energy. They also produce immense amounts of heat as they can’t be air-cooled (thus, you’ll need to have A/C). Because of the high heat and strong light intensity, these fixtures often require ceilings in the 10-or-above-foot range.
Light Emitting Diodes (LED)
LED’s have become more popular in recent years due to advances in technology. These grow lights utilize high-power Chip on Board (COB) technology to produce a much higher lumen output than standard LED’s. It’s important to recognize that not all LED’s are created equal—some are not very powerful, while others can outperform the standard HPS grow light. LED’s can be used throughout flowering and vegetative stages.
Pros
LED fixtures are great for rooms with lower ceilings. They also have the greatest energy efficiency of any lighting option, which results in electricity cost savings. Light intensity and penetration rivals or exceeds HPS depending on the specific make and model. The spectrum on LED fixtures is more broad/complete than any HPS option. These fixtures are relatively small and produce little heat. The bulb life is substantially longer than any other lighting option.
Cons
The biggest hurdle to implementing LED fixtures is the upfront cost—they can be expensive, although prices have been coming down significantly over the past 10 years. Cheap LED fixtures are simply inferior and do not produce the same results as high-quality COB LED options.
Ceramic Metal Halide (CMH)—aka Light Emitting Ceramic (LEC)
LEC’s and CMH’s (generally used interchangeably) are also a newer trend in the cannabis grow light world. The primary difference with these lights over a traditional MH bulb is that they use a ceramic arc tube as opposed to quartz. The benefit is a more natural color spectrum, more light per watt, and longer lasting bulbs. CMH fixtures can be used during both the flowering and vegetative stages.
Pros
CMH fixtures excel in rooms with lower ceilings. These fixtures are energy efficient and produce a very natural spectrum of light with high lumen output. The light intensity and penetration increases with higher wattage fixtures. These fixtures produce minimal heat and have a long bulb life.
Cons
Cost is considered to be middle of the road—more expensive than HPS, cheaper than LED.
Fluorescent Lights
Most people are familiar with fluorescent lighting systems as they are common in offices, workshops, garages, etc. They are an energy-saving light bulb that was designed to replace the standard incandescent bulb. In fact, they are up to four times more efficient and last up to 10 times longer than incandescent bulbs. These fixtures are typically only used for vegetative growth.
Pros
Inexpensive fixtures with low energy requirements. Compact Fluorescent (CFL) fixtures are great in compact spaces. The heat output is manageable and the fixtures come in a variety of sizes. These fixtures produce a natural light spectrum. They also benefit from a long bulb life.
Cons
These fixtures can only be used for vegetative growth due to the low light intensity and penetration.
Common Problems for First Time Marijuana Growers
You Started With The Wrong Genetics
No matter how talented a grower you are, you simply cannot produce stellar results with poor genetics. Poor genetics could mean low quality seeds, auto-flowering seeds, or weak and infected clones. The moral of the story is this; make sure you start off with strong genetics! This doesn’t necessarily mean high yielding genetics, but rather clones or seeds that are healthy, vigorous and are the actual strain listed—you’d be surprised how few times that’s the case.
If you are going to start from seed, make sure you select strains from a well-respected breeder who tests their seed lines before releasing them to the public. There are too many people claiming to be ‘breeders’ who really know nothing of the subject and are selling untested seeds with hermaphroditic tendencies.
Because many breeders do not sell their seeds directly, you must purchase from a trusted seed bank, who’s the retailer of seeds for several breeders. Make certain that you purchase from a reputable seed bank who delivers the seeds in sealed, tamper-proof packaging to ensure the seeds weren’t swapped—yes, this actually happens.
If you intend to start from clone, please make sure you acquire it from a trusted gardener or dispensary—you should be familiar with the integrity of their garden and cultivation practices. Without hesitation I can tell you that the fastest way to ruin your grow is to bring in outside cuts from other people’s gardens.
You may finally get a shot at a strain you’ve wanted for years, but is it worth acquiring it only to find out you got russet mites a week later? Probably not. Be absolutely certain when bringing in outside genetics, and always be sure to keep them in quarantine for several weeks until you have treated them with routine IPM and verified cleanliness.
Your Plants Were Only As Strong As Your Weakest Input
Growing cannabis involves a lot of variables: environment, genetics, grow medium, pruning, water quality, feeding regimen, integrated pest management…the list goes on—and it all needs to be perfect. There is a famous aphorism that says, “Growth is controlled not by the total amount of resources available, but by the scarcest resource.” This means you could have been doing everything else right, but if you didn’t balance your soil, you’ll never grow top-shelf cannabis.
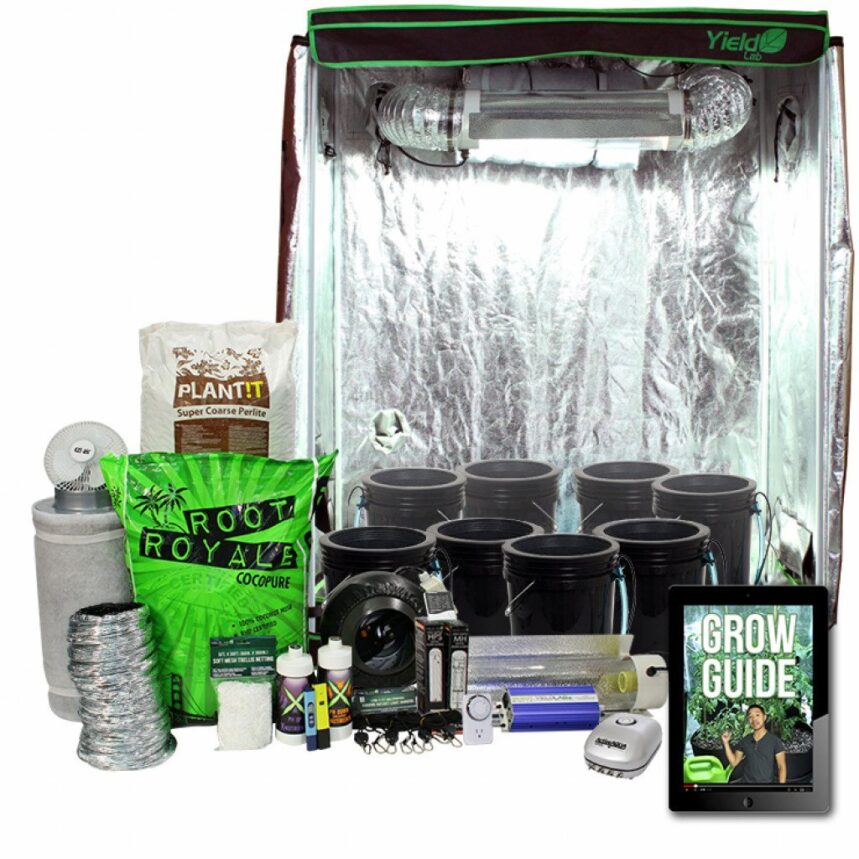
Why You Should Skip the All-in-One Grow System
When learning to grow weed indoors, it’s tempting to buy a complete grow tent package—don’t!
Although these kits may work well for a select few, they do not take into consideration your specific space, power limitations, equipment requirements, growing style, or goals.
There are some exceptions to this rule, as we mentioned above, but always be on the lookout for the following red flags:
Things to Avoid
Small growing cabinets: Cannabis plants like to grow tall—most literally double in height during the flowering phase. Your tent, room, or closet should be at least six feet for best results.
‘Automated’ systems: If you aren’t checking your plants regularly, you’ll be disappointed come harvest time. Growing pot is not a passive activity, there is always something to do—clone, prune, transplant, clean. Plus, the word automation typically implies hydroponics, which we don’t recommend.
Pro tip: the best water automation tool for soil growers are blumats (like these). Watering is the only task that should be automated besides environmental controls.
‘Complete grow kit’: While these kits sound enticing, they don’t often work that well for a variety of reasons. I will outline them below.
Things to Consider
There are several important factors to consider if you are looking into purchasing a complete grow kit:
Size: Does the kit make the most of your grow space? Is it tall enough to accommodate flowering plants?
Power: Are you trying to save power by running energy efficient lighting? If so, you’re going to need an LED or Ceramic Metal Halide (CMH) lighting system to conserve energy while maximizing output. Also keep in mind that not all LEDs—or any lighting system for that matter—are created equal. Do your research!
Quality: While a turn-key growing system may have most of the equipment included, does it indicate the brand and quality? Slacking on a carbon filter is a recipe for upset neighbors. An inaccurate thermometer doesn’t help anyone.
Grow Medium: If your kit comes with hydroponic growing equipment but you intend to grow in soil, you’re going to be purchasing additional items, as opposed to saving money like you originally thought. Does it have the right size and type of pots?
Completeness: Does it really have everything you need? What else will you need to purchase?
Cost: Are you really getting a deal or are you paying a premium for the all-in-one kit? My recommendation is to piece together the components separately and see how that price compares to the complete grow kit.
As you can see from the list above, there’s a lot to consider before pulling the trigger on a complete grow kit.There are certain situations in which the all-in-one grow kit will work but it will not give you the customization required to truly make the most of your space within the context of your goals. While it’s easy to be overwhelmed at first glance, setting up your grow space only requires a few key items.
Table of Contents